

Data Sources
Data Sources is where you connect and manage everything that feeds Dr Migrate. It's the first stop in every project: until a source is connected and processed, there's nothing to explore, map or plan. Connecting your data is the prerequisite for Workload Mapping and every insight that follows.
The screen has two top modes. Server Discovery manages your live and point-in-time discovery sources; Import is for the supporting data files you bring in yourself.
Connecting data is step one. Once a source is processed, head to Workload Mapping to turn your discovered servers into application workloads.
Server Discovery
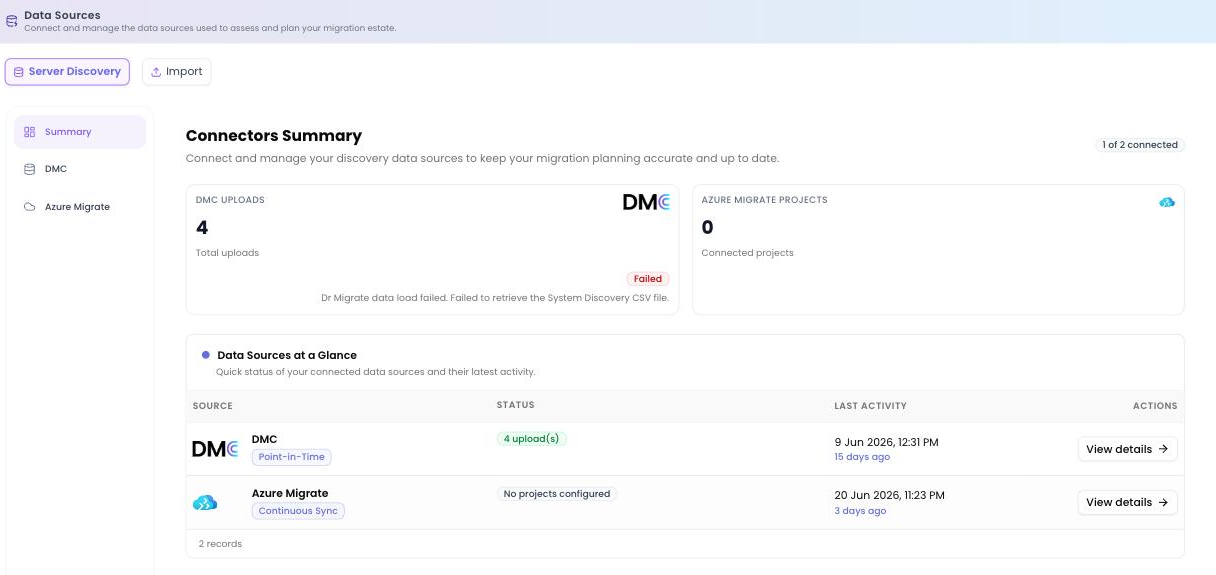
The Server Discovery mode has a left sub-nav with three views: Summary, DMC and Azure Migrate.
Summary
The Connectors Summary gives you a single view of every source feeding the project. Two cards lead the screen: DMC (a total count of scans uploaded) and Azure Migrate Overview (how many projects are connected and servers discovered).
Below them, a Connected Data Sources table lists each source with its Source, Type, Status, Last Activity and an Actions column whose View details link jumps to the matching tab. An Export button downloads the table. Any failed uploads are flagged here so you can spot and retry them quickly.
DMC
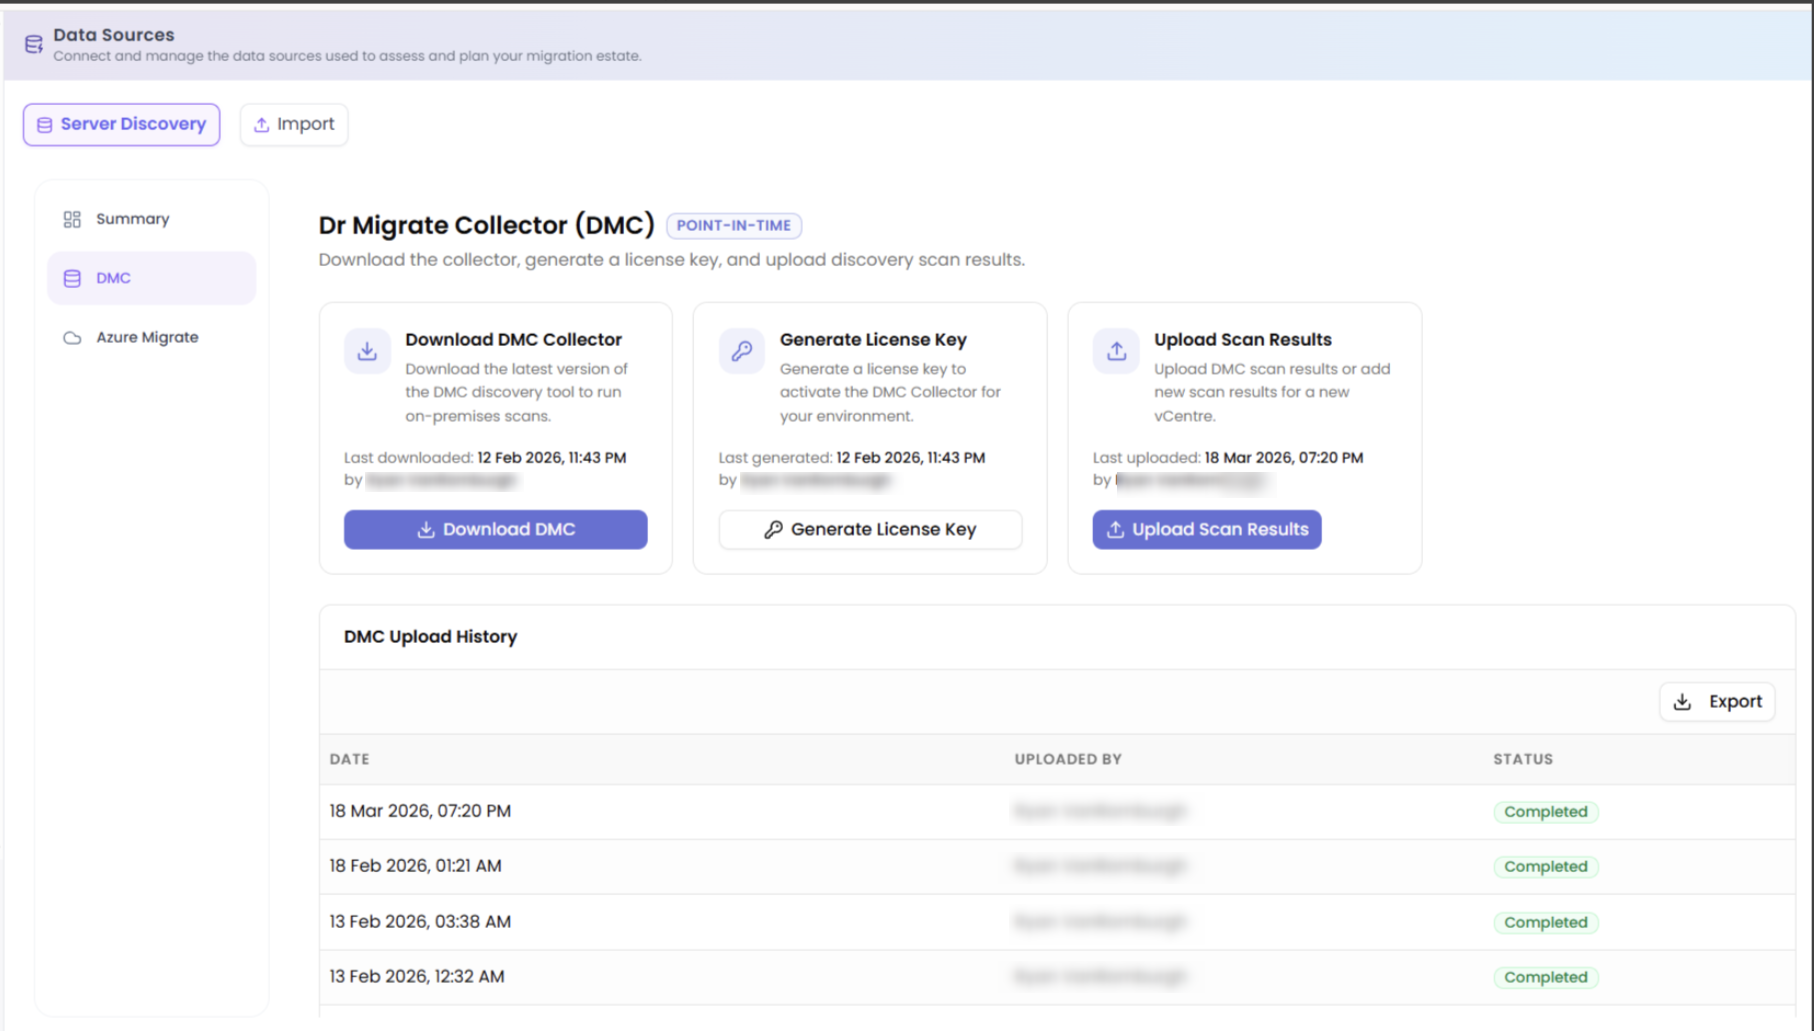
Dr Migrate Collector (DMC) is a point-in-time source: run the collector against your environment and upload the resulting scan. The total uploads count lives on the Summary tab; this tab offers three DMC Actions, each showing its own last-run detail:
| Action | What it does |
|---|---|
| Download DMC | Get the latest version of the collector to run on-premises scans. |
| Generate License Key | Create a time-limited key that authorises a collection run. |
| Upload Scan Results | Upload a new scan, including results for an additional vCenter. |
A DMC Upload History table lists every upload with its Date, Uploaded by and Status, and has its own Export. You can run multiple DMC scans one after another and they stack into the same project, so you can build your estate up over time and across multiple environments.
DMC scans VMware, Hyper-V and physical servers, AWS (EC2 and full estate discovery), and SQL databases, so a single collector can cover an on-premises and AWS estate before you bring it into Dr Migrate.
For how to install, run and scan with DMC (including AWS scanning), see Data Collection → DMC.
Azure Migrate
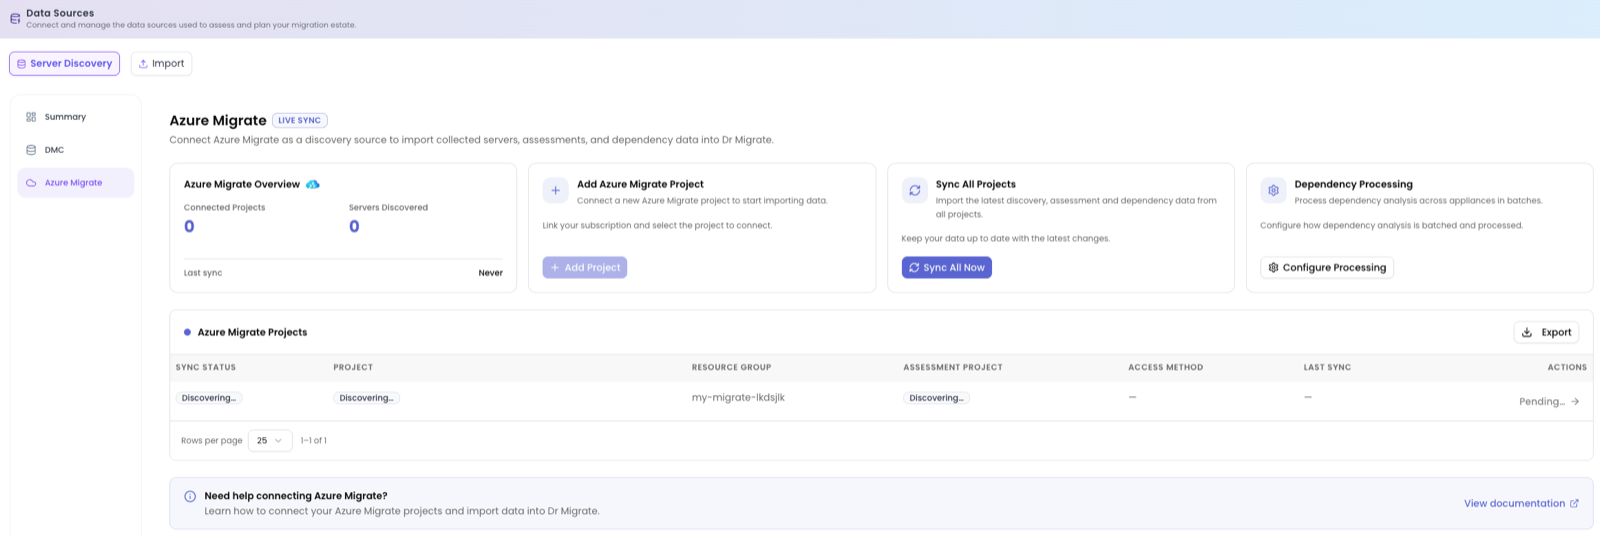
Azure Migrate is a live sync source. Once connected, Dr Migrate imports collected servers, assessments and dependency data, and keeps in step with your project. The tab shows tiles for projects and servers discovered, and gives you four buttons:
- Add Azure Migrate Project: connect one or more projects
- Sync All Projects Now: trigger an on-demand sync
- Dependency Collection: configure how many servers collect dependency data per rotation, across scheduled server groups
- Export: download the projects table
The Azure Migrate Projects table tracks each project's Sync Status, Project, Resource Group, Assessment Project, Access Method, Last Sync and Actions.
Dr Migrate connects to Azure Migrate using a limited-scope service principal. See Technical Reference → Azure Integration for the connection detail.
Use one source or both
You don't have to choose. Dr Migrate supports DMC and Azure Migrate concurrently and merges them into a single estate, useful when different parts of your environment are discovered by different tools.
Import
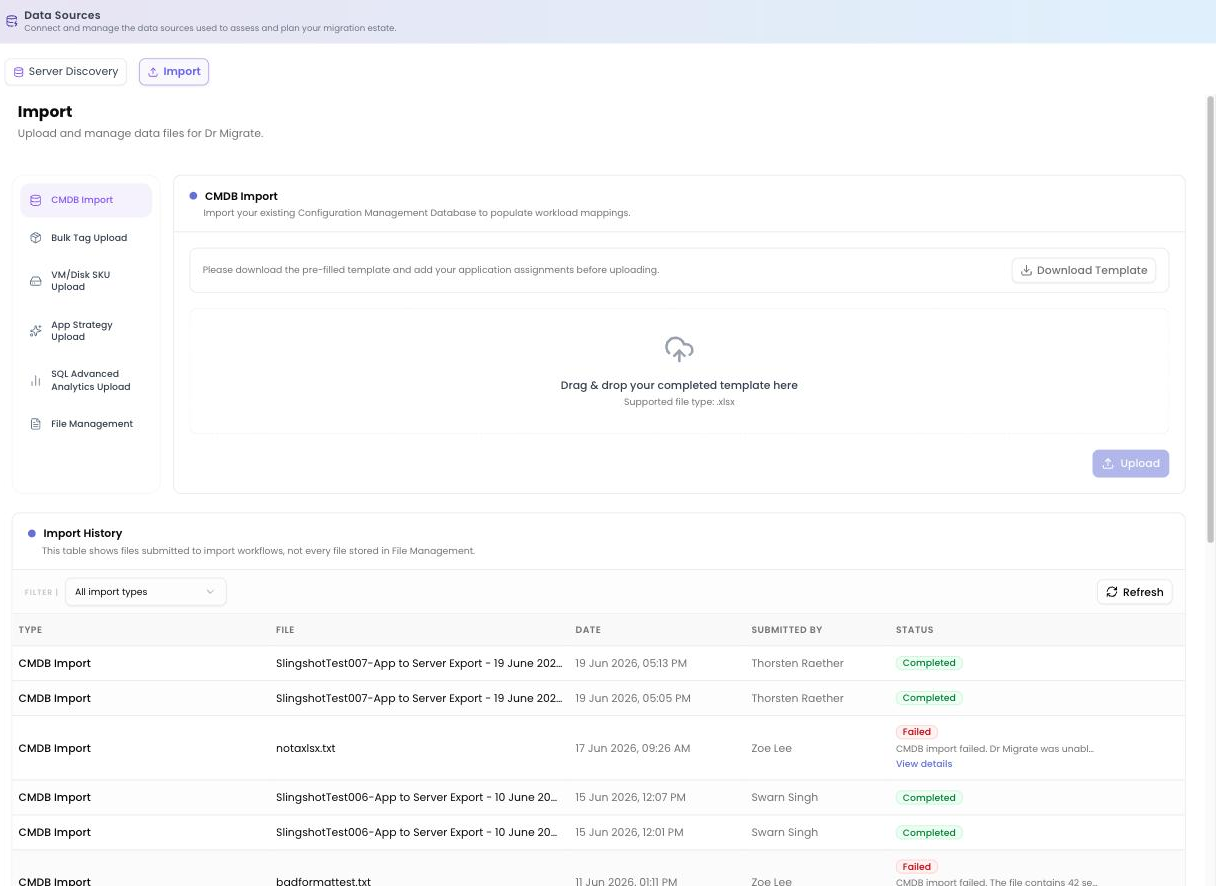
The Import mode is for the supporting data files you already hold. Its left sub-nav has four types: CMDB Import, Bulk Tag Upload, VM/Disk SKU Upload, and File Management. All four share an Import History table that tracks every submitted file by Type, File, Date, Submitted by and Status, with Filter, Refresh and Export controls.
| Import | Purpose |
|---|---|
| CMDB Import | Populate workload mappings from your existing CMDB. Download Template, then drag and drop a completed .xlsx and Upload to apply your application assignments. |
| Bulk Tag Upload | Update server and application key-value tags in bulk via a template, handy for filtering and reporting. |
| VM/Disk SKU Upload | Upload target VM and disk SKU data. The template supports region, payment model and hours per server. |
| File Management | Upload, download and manage files in the Azure storage account, and update the customer logo. |
CMDB Import
Download Template to get a spreadsheet, complete it with your server-to-application mappings, then drag and drop the finished .xlsx and Upload. Dr Migrate uses it to populate your workload mappings.
The CMDB Import is the same data path as Bulk Upload in Workload Mapping: it's the fastest way to jump-start mapping if you already hold server-to-application data.
Bulk Tag Upload
Update server and application key-value tags across many records at once. Download the template, add your tags, and upload to apply them, useful for slicing the estate by business unit, environment or any custom dimension.
VM/Disk SKU Upload
Upload target VM and disk SKU data in bulk. The template supports region, payment model and hours, so you can set the intended Azure shape and cost basis per server outside the UI.
File Management
File Management lets you upload, download and manage the files stored in your environment's Azure storage account, and update the customer logo. It offers four modes:
| Mode | What it does |
|---|---|
| Upload VM file | Upload a VM data file directly into storage. |
| Fetch from URL | Pull a file into storage from a supplied URL. |
| Browse files | List stored files in a table: File Name, Type, Download, and Copy link. |
| Customer logo | Update the logo shown for the customer. |
What happens after ingestion
Once a source is connected and processed, Dr Migrate runs the data through its internal algorithms and your environment becomes available across the product:
Group servers into applications.
Explore the discovered estate.
Including your Rapid Insights report.
Next step
With data flowing in, the most valuable next move is Workload Mapping: it makes every downstream insight and plan application-aware.